When you’re selling products online, good product photography is essential. It’s the first thing potential customers see, and it can make or break a sale. In this post, I’ll discuss how product photographs influence online customers while offering tips and best practices for creating digitally appealing images of your items and displaying them effectively on your online store to get more sales.
Why is product photography so important?
Product photographs are essential for eCommerce because they allow internet customers to get a clear visual idea of what they’re buying. Unlike when shopping in a physical store, customers can’t touch or try on the items they find online. It’s important that eCommerce stores use high-quality product photography to give their shoppers a realistic idea of what they’re purchasing. Poorly lit, blurry, or pixelated images will only frustrate potential customers and may cause them to look elsewhere for their purchase.

How can anyone trust the seller to take care of their items if they can’t even take good pictures? Product photography should be high quality, clear, and consistent across all product pages. This will give your store a professional look and make it easier for potential customers to find the items they’re interested in.
Now, I know what you’re thinking: “I’m not a professional photographer! I don’t have the equipment, nor do I know how to take good product photos.” Don’t worry – you can shoot great product photos for your online store, even if you don’t have a lot of experience or equipment. Whether you’re an eCommerce store owner who wants to take your own product shots, or you’re just looking for some tips on how to make your online shopping experience better for your buyers, read on!
1. Lighting is key - use natural lighting whenever possible and adjust your camera’s settings to get the best results
The first thing you need to do is make sure that you have good lighting. Natural lighting from outside your office or home can be ideal for taking pictures. Find a location where you can place your product to get the best light and adjust your camera’s settings to get the most accurate colors.

If you’re taking pictures indoors, try to use a room with lots of windows. If the light is too harsh, you might want to diffuse it with a soft sheet or paper draped over the window. If that’s not possible, then use artificial light to supplement the natural light. Place your product near a window or use lamps with white lights to create an evenly lit scene. Be careful not to use lights that are too bright or that have a yellowish tint, as they will cast an unwanted color onto your product. Portable light sources that are frequently utilized by professional photographers can be purchased for around $50.
Alternatively, you can setup a table underneath a main light and use a flashlight or phone to help light your product. Just be careful of other lights inside the room you’re shooting in, as other light will contaminate the set and can cause your pictures to be overexposed.
If you’re having trouble getting good lighting, try using a white background or shooting against a light-colored surface. This will help to reflect more light onto your product and create better images. Avoid shadows on your product as they can be tricky to edit out in post-processing.
For small products, I created a lightbox out of cardboard, white posterboard, and a clamp for fill light. This helped to create a more consistent lighting environment and eliminated the need for external light sources. For larger items, I’ve used a bedsheet spread across a table and chairs to create a white background. It’s simple, it doesn’t break the bank, and all you need is a little imagination!

Once you have your lighting situation under control, it’s time to adjust your camera’s settings. You want to make sure that the pictures are in focus and that the colors look accurate. The best way to do this is to use a setting called “white balance.” This will adjust the colors in your photo so that they look natural, regardless of the light source. Most cameras have a white balance setting, but if yours doesn’t, there are apps available that can help you set the correct white balance for your photos on computers.
If you have a DSLR camera, look for the manual mode where you can modify f-stop, ISO, and shutter speed. This will give you more control over the lighting and allow you to take better pictures. If you’re using your mobile phone, Google’s or Apple’s built-in software can help you adjust the lighting in edit mode to get better results. You may need to play around with your phone’s settings to get the best results.
2. Backgrounds are important too - choose a simple background that won’t distract from the product
Choosing a background is just as important if not more than you might think. You need to consider things like where it will be displayed, and whether or not the background image needs to change for different seasons, holidays, or events. My advice: stick with simple backgrounds.

A product shot against a clean white background is always appealing. You can also use a light-colored wood or marble background if you want to add some texture and depth to your photos.
If you’re going to be shooting against a solid color background, try to choose a color that will complement the product’s colors. A black background is great for products with bright colors, while a dark green or blue background can help bring out the hues in more muted products. You may also construct a simple backdrop out of cardboard, poster board, or fabric if you wish.
Avoid using busy backgrounds with lots of colors and patterns. They’ll distract your shoppers from the product and make it harder for them to make a purchase decision on your online store.
If you’re using your phone, try different techniques like zooming in closer to your product so there’s less of a background in the photo. You can also use a shallow depth of field to blur the background and make your product stand out more. Phones have bokeh mode which can be used to achieve this effect.
Bear in mind that image quality is related to a higher conversion rate since customers can get a better look at the item and evaluate its features and characteristics.
3. Edit your photos - use photo editing software to make your products look their best
I always use an editing process for my product photos. This helps to ensure that the images look as good as possible, and it also gives me more control over the final product.
There are a lot of different photo editing programs out there, and I’m sure you already have one on your computer. If not, Adobe Photoshop and Lightroom both offer free trial versions that you can use to get started.
If you’re not sure how to use Photoshop or Lightroom, there are plenty of online tutorials that can help you get started. There are also YouTube videos that show you how to take your eCommerce photography up a notch using some simple techniques. This can include things like contrast adjustments, color corrections, and adding a little bit of sharpness.
I also like to use filters if the photo needs it. Don’t forget, all smartphones come with various editing software that you can use to make your final image look better. There’s no right or wrong way to edit your photos – just find what works best for you and makes your products look their best.

You can always do a Google search for “photo editing tips” or “how to edit photos like a pro” if you want some more ideas. Play around with the settings until you’re happy with the results. Just don’t go overboard with the edits – you want your photos to look realistic, not like they’ve been completely Photoshopped!
4. Use good composition - place your product in an interesting setting and take multiple shots from different angles
These are lifestyle photos of my cat. They look professional and they also include close-up shots that shows how cute he is, as well as multiple angles to show his personality. I like them so much he’s pretty much got his own social media account.

When composing your product photos, you want to think about the overall scene. Is there something interesting in the background that will draw attention away from the product? Are all of the angles covered, or are some more appealing than others?
Including multiple final shots of your product from different angles is a great idea, as online shoppers rely on high quality product photos to choose from and allows them to understand how big or small the item actually is. Don’t be afraid to get creative with your compositions – just make sure the focus remains on the product.

5. Take advantage of props - use props to add interest and highlight the features of your product
Another product photography tip to show people what your product is, is to use props. Say you’re selling a cactus. Find something that is complementary to the cactus, like a pot or some rocks. If you’re selling sunglasses, put them on someone’s head!
Product photo props can also help to highlight the features of your product. If you’re selling a frying pan, for example, include a picture of it cooking eggs. If you’re selling clothes, show them being worn by someone.
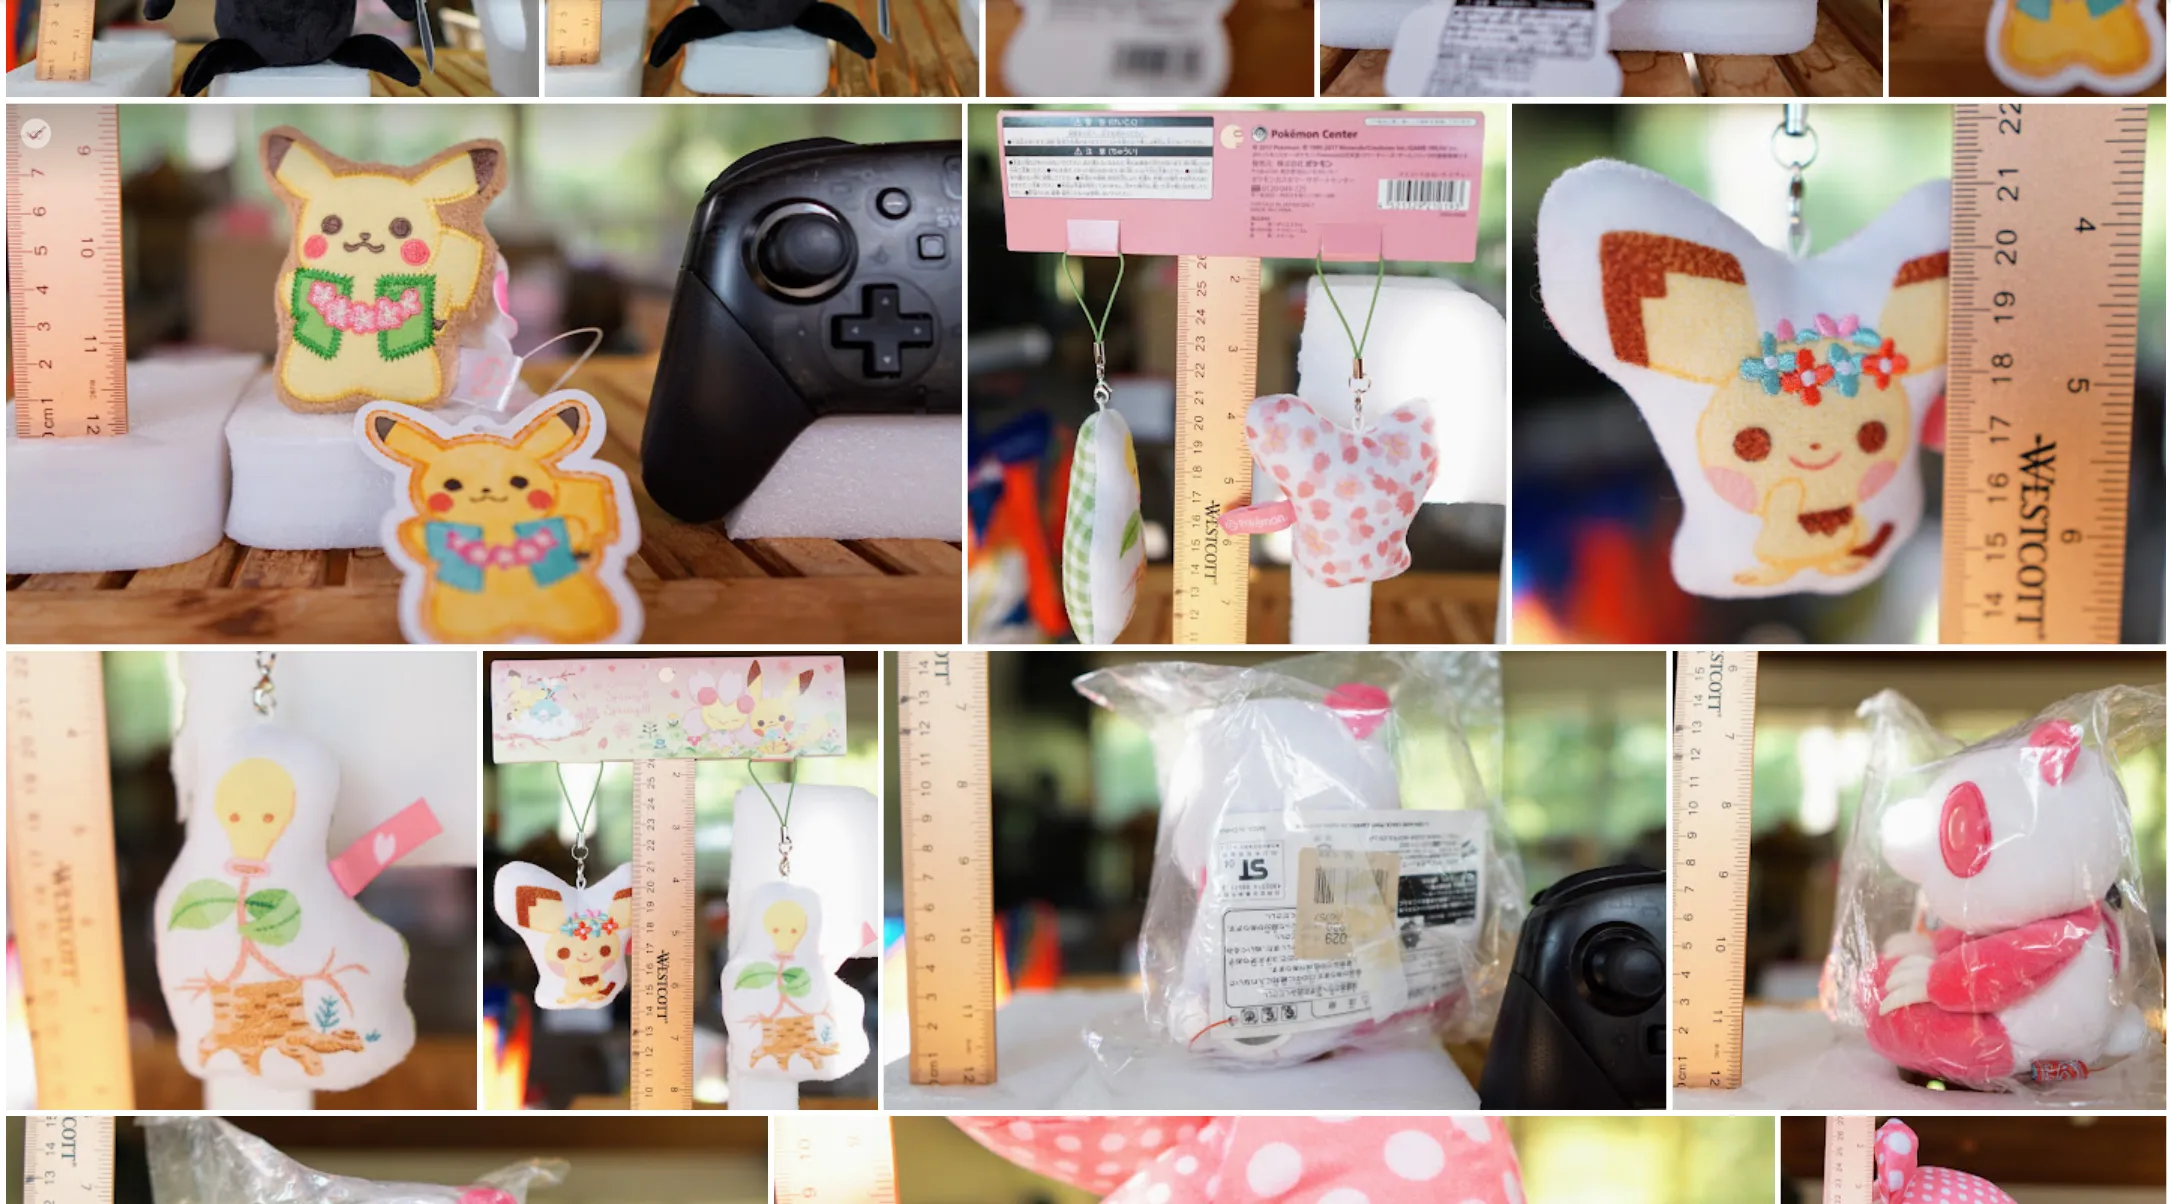
I keep it simple by showing other items of similar size to the product I’m selling. This gives a better understanding of scale and how the product looks in its natural environment. If you have a brand image or slogan, you can also use props to feature this in your photos.

6. Use a model if necessary - if you can’t take a good picture of the product itself, use a model to show it off
I’ve got a real ugly mug, but it’s great for coffee :) I don’t always recommend using a model to sell products, and it’s usually not a key deciding factor for shoppers. However, if you can’t take a good picture of the product itself, using a model can be a great way to show it off. There’s no need to go overboard with the modeling. Just have someone hold the product or show it in use and you’ll be good to go.

If you’re not comfortable with using models or don’t have any friends or family that are willing to help, there are plenty of online resources that can help. There are also websites and agencies that specialize in providing stock photos or models for your product shots. Just make sure you have the rights to use any images you borrow before you start photographing away!
The Take Away
You increased online shopper’s perceived value of your product, by showcasing it through photography that is not only of the highest quality but also styled and edited to perfection. This in turn helps them in their purchasing decision, as they can trust that what they are buying is exactly what they see.
ECommerce has become increasingly reliant on visuals in order to make a purchase, so your job as a store owner is to highlight your products in the most favorable way possible. This can be done with good composition, props, and models – whichever works best for your product. And don’t forget to take advantage of photo editing software to optimize images for great photos.
By following these simple tips, you’ll be able to create beautiful and eye-catching product photos that will help increase sales in your eCommerce business!

If this is too much of an undertaking, hiring a professional photographer is always an option. Just be sure to do your research and find someone who knows how to photograph eCommerce products in the best detailed shots possible, and well verse with eCommerce websites that can optimize for load speed, search engines, visual appearance, and social media.
Do you have any other tips for photographing eCommerce products? I’d love to hear from you! Be sure to visit my ecommerce website as well, whenever I get around to migrating it. :)